The holiday season, particularly Thanksgiving, conjures images of tables laden with delicious food, surrounded by loved ones. At the heart of many festive spreads lies a true culinary star: the homemade buttery herb stuffing. Its rich aroma of savory herbs and melted butter, combined with a comforting texture, defines the essence of a celebratory meal. However, preparing such a labor of love can often feel overwhelming amidst the flurry of holiday tasks. What if you could capture that classic, from-scratch taste without the last-minute stress? The secret lies in making it ahead and utilizing the power of a freeze dryer like the CUBE to preserve its perfection.
This article will guide you through crafting a sublime homemade buttery herb stuffing, then reveal how easy it is to freeze-dry it, ensuring you have a delectable, ready-to-rehydrate side dish at your fingertips, making every holiday meal effortless and incredibly delicious.
The Heart of the Holiday Table: Why Choose Homemade Buttery Herb Stuffing?
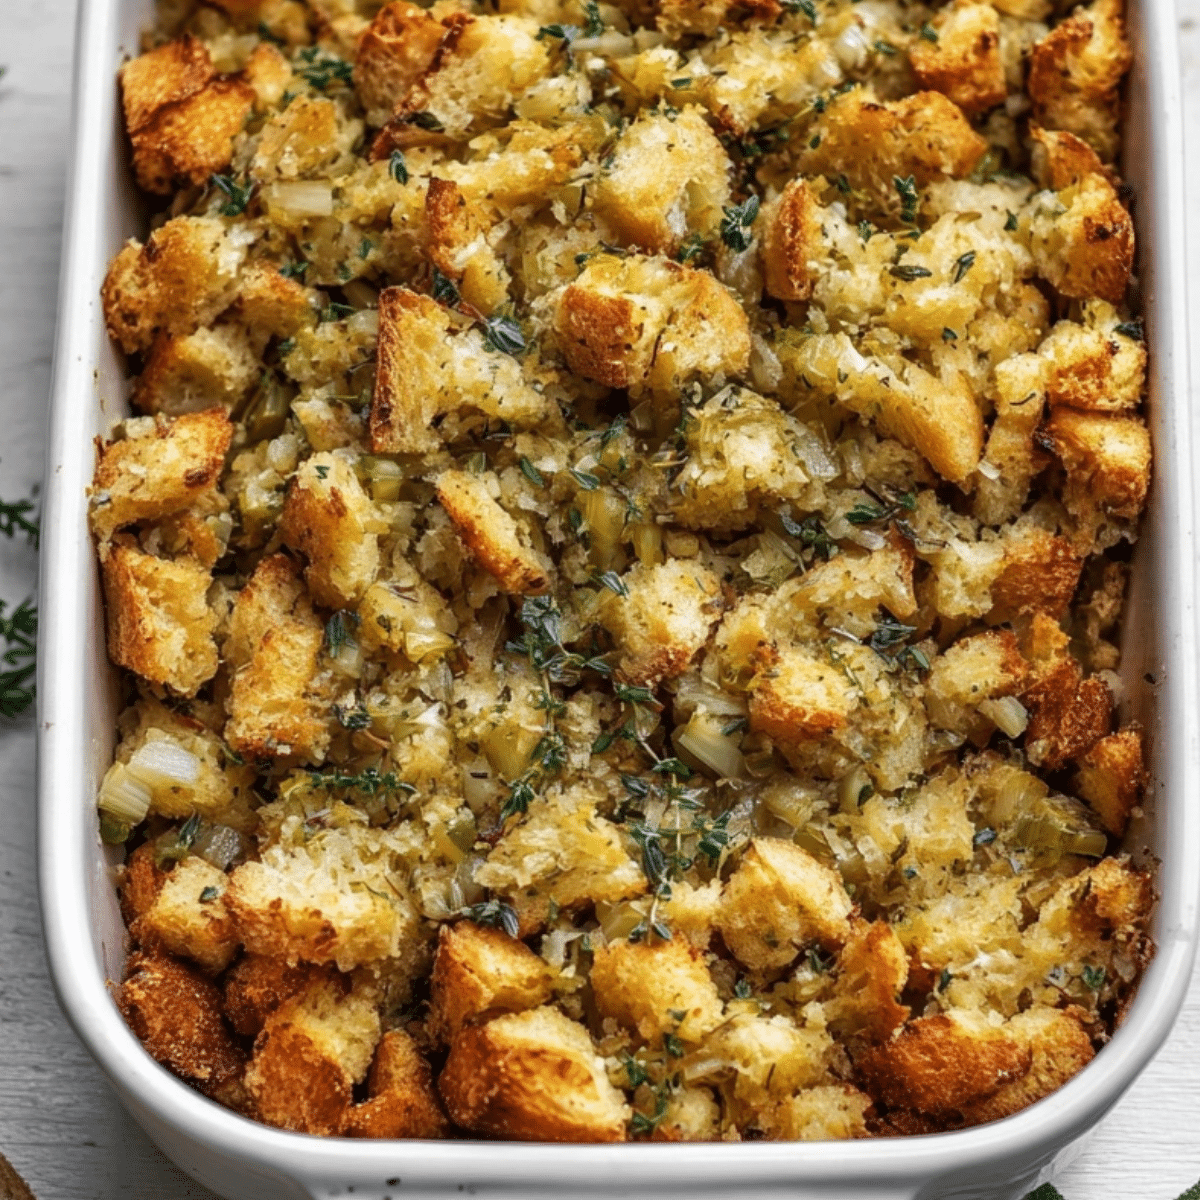
There's a reason why stuffing consistently ranks among the most anticipated Thanksgiving sides. It’s more than just a dish; it’s a feeling. While convenient boxed mixes exist, nothing quite compares to the depth of flavor and satisfying texture of a truly Classic Homemade Buttery Herb Stuffing for Thanksgiving. The subtle crunch of a perfectly toasted crust giving way to a moist, aromatic interior is an experience that simply can't be replicated with shortcuts.
Opting for homemade allows you to control the quality of ingredients, from the freshness of the herbs to the richness of the butter and stock. This foundational recipe champions classic flavors, combining fragrant fresh sage, earthy rosemary, and bright parsley with sweet sautéed onions, crisp celery, and pungent garlic. The addition of dried cranberries provides a delightful counterpoint of sweetness and tang, elevating the entire dish. It's this thoughtful combination that transforms simple bread cubes into an extraordinary side, creating a memory-making culinary masterpiece that truly brings everyone to the table.
Mastering the Art of Perfect Stuffing
Crafting the ultimate homemade buttery herb stuffing doesn't require advanced culinary skills, just a bit of attention to detail and quality ingredients. Here's how to build a flavor foundation that will impress.
Essential Ingredients for Unforgettable Flavor
- Bread Cubes (18-24 oz): This is your base! Don't underestimate the importance of stale or toasted bread. It acts like a sponge, soaking up all the rich butter, stock, and herb flavors without turning mushy. A mix of sourdough and Italian bread offers a wonderful complexity in both flavor and texture.
- Unsalted Butter (1 cup): The "buttery" in buttery herb stuffing. Unsalted allows you to control the saltiness of the dish.
- Aromatics:
- Sweet Onion (3 cups diced): Roughly 2 large onions, providing a foundational sweetness when sautéed.
- Celery (2 cups diced): Adds essential crunch and a fresh, peppery note.
- Garlic (6 cloves, minced): The aromatic backbone that ties all the savory flavors together.
- Freeze-Dried Cranberries (1 1/2 cups): These add a burst of tart-sweetness that beautifully cuts through the richness of the butter and herbs. Their freeze-dried state means they rehydrate perfectly within the stuffing.
- Fresh Herbs (or Freeze-Dried Equivalents): The stars of the show!
- Sage (1 1/2 tablespoons freeze-dried): Earthy, peppery, and truly reminiscent of holiday flavors. If using fresh, finely chop about 4-5 tablespoons.
- Parsley (1 1/2 tablespoons freeze-dried): Bright and herbaceous, providing a fresh counterpoint. If using fresh, finely chop about 4-5 tablespoons.
- Rosemary (1 1/2 tablespoons freeze-dried): Piny and aromatic, a classic holiday herb. If using fresh, finely chop about 2-3 tablespoons.
- Chicken or Vegetable Stock (2 1/2 cups): Adds moisture and a savory depth. Use vegetable stock for a vegetarian option.
- Large Eggs (2): Act as a binder, helping the stuffing hold its shape and adding richness.
- Kosher Salt and Freshly Ground Black Pepper: Essential for seasoning to taste.
Step-by-Step Stuffing Preparation
- Prep Your Bread Cubes: This crucial first step ensures your stuffing has the right texture.
- Option 1 (Overnight): Cut 1.5 pounds of bread into 1-inch cubes and spread them on a baking sheet. Leave them uncovered overnight (or up to 2 days) to air dry. This creates the perfect stale foundation.
- Option 2 (Quick Toast): For faster results, spread the cubes on a baking sheet and toast in a 350°F (175°C) oven for 15-20 minutes, stirring occasionally, until crisp and golden. Let cool completely.
- Option 3 (Store-Bought): Purchase pre-toasted bread cubes for ultimate convenience, though homemade bread often yields superior flavor.
Pro Tip: Mixing different bread varieties like sourdough and Italian adds complexity and a delightful textural interplay.
- Sauté the Aromatics: In a large, heavy-bottomed skillet or Dutch oven, melt the butter over medium heat. Add the diced onion, celery, freeze-dried cranberries, and minced garlic with a generous pinch of salt and pepper (start with ½ to 1 teaspoon of each). Cook, stirring occasionally, for 8-10 minutes until the vegetables are softened and translucent. Stir in the freeze-dried sage, parsley, and rosemary, cooking for just one more minute until fragrant. This ensures the herbs bloom and release their full flavor.
- Combine with Bread: Pour 1 cup of the stock into the skillet with the sautéed aromatics. This deglazes the pan and creates a rich liquid base. Pour this entire mixture over your prepared bread cubes in a very large bowl, tossing gently but thoroughly to ensure the bread is well coated.
- Whisk in Egg Mixture: In a separate bowl, whisk together the remaining 1½ cups of stock and the 2 large eggs until well combined. Pour this liquid over the bread mixture. Stir gently until all ingredients are evenly distributed and the bread has absorbed the moisture. Be careful not to overmix, which can lead to a dense stuffing.
- Bake to Perfection: Transfer the stuffing mixture to a greased 9x13 inch baking dish (or two smaller dishes if preferred). Bake in a preheated 350°F (175°C) oven for 45-50 minutes, or until the stuffing is golden brown on top, crispy around the edges, and reaches an internal temperature of 160°F (71°C). If the top begins to brown too quickly, loosely tent the dish with aluminum foil. This step is essential for that Ditch Boxed Mixes: Fluffy Buttery Herb Stuffing Recipe experience you're after!
The Ultimate Make-Ahead Hack: Freeze-Drying Your Stuffing with CUBE
The beauty of this homemade buttery herb stuffing recipe isn't just in its incredible flavor; it's also in its adaptability for make-ahead convenience, especially when paired with a CUBE freeze dryer. Say goodbye to last-minute holiday stress!
Why Freeze Dry Stuffing?
Freeze-drying transforms your freshly baked stuffing into a shelf-stable, lightweight, and nutrient-rich pantry staple. Here's why it's a game-changer for holiday prep and beyond:
- Unmatched Convenience: Prepare your stuffing weeks or months in advance, freeing up valuable time and oven space on busy holiday mornings.
- Preserves Homemade Quality: Unlike conventional freezing, freeze-drying retains nearly all of the original flavor, texture, and nutritional value, so your rehydrated stuffing tastes just like it was freshly baked.
- Long-Term Storage: Properly stored, freeze-dried stuffing can last for years, making it perfect for emergency food supplies or simply ensuring you always have a gourmet side dish on hand.
- Reduces Waste: Make a large batch without worrying about leftovers spoiling.
- Portion Control: Freeze-dry in individual or family-sized portions for ultimate flexibility.
CUBE Freeze Drying: A Step-by-Step Guide
Once your delectable stuffing is baked and cooled, it's ready for its freeze-drying transformation:
- Cool Completely: This is critical! Ensure the stuffing is thoroughly cooled to room temperature, or even chilled, before placing it in the freeze dryer. Warm food can create excess moisture during the freeze-drying process.
- Prepare Trays: Break the stuffing into manageable pieces if it's too dense, then spread it evenly on your CUBE freeze dryer trays. Avoid overcrowding, as this can hinder efficient drying.
- Weigh and Record: Before starting the cycle, weigh each tray with the food on it and record the weight. This measurement is crucial for calculating the precise amount of water needed for rehydration later.
- Run the Cycle: Follow your CUBE freeze dryer's instructions for running a cycle. The CUBE is designed to optimize the freeze-drying process for a variety of foods.
- Post-Drying Weighing: Once the cycle is complete and the food is fully dry (it should be light and crispy, with no discernible moisture), weigh each tray with the dried food again. The difference between this weight and your initial wet weight tells you exactly how much water was removed, which directly corresponds to the amount needed for perfect rehydration.
- Storage: Immediately transfer the freeze-dried stuffing into airtight Mylar bags. Add an oxygen absorber to each bag before sealing. This combination protects the food from oxygen and moisture, ensuring its long-term freshness and preventing spoilage. Store in a cool, dark place.
Rehydration for Instant Enjoyment
The magic of freeze-drying truly shines when it's time to rehydrate:
- Measure Water: Based on the weight difference recorded during the drying process, you'll know exactly how much water to add. A good general starting point is 1.75 oz (approximately 50ml) of water for every gram of freeze-dried stuffing.
- Rehydrate: Place the desired amount of freeze-dried stuffing in a heat-safe, covered container. Slowly add the measured water, stirring gently to ensure all pieces are moistened. Cover the container and let it sit for 15-20 minutes, or until the water is fully absorbed and the stuffing has regained its original texture. You might need to add a tiny splash more water if it seems too dry, or drain a little if it's too wet.
- Heat and Serve: Once rehydrated, transfer the stuffing to a baking dish and place it in a preheated 350°F (175°C) oven for 10-15 minutes, or until thoroughly heated through and slightly crispy on top. Serve hot and enjoy that fresh, homemade taste!
Tips for Serving and Customization
While this homemade buttery herb stuffing is a star on its own, don't hesitate to personalize it:
- Add Protein: For a heartier dish, sauté cooked sausage (pork, turkey, or vegetarian) or diced mushrooms with your aromatics.
- Nutty Crunch: Stir in toasted pecans or walnuts with the bread cubes for added texture and richness.
- Herb Variations: Experiment with other fresh herbs like thyme, marjoram, or even a touch of rosemary for a different aromatic profile.
- Citrus Zest: A little orange or lemon zest can brighten the flavors, especially complementing the cranberries.
- Broth Choice: Use vegetable broth for a delicious vegetarian option.
- Serving: While perfect with roasted turkey or chicken, this stuffing is also a fantastic side for pork chops, meatloaf, or even as part of a hearty brunch.
Embrace the convenience and incredible quality that freeze-drying offers. With this recipe and your CUBE freeze dryer, you can effortlessly create a memorable homemade buttery herb stuffing that tastes like you spent hours in the kitchen, making every holiday truly easy and delicious. Enjoy the flavors of tradition, simplified for modern life!
